First, pick your frame. To me, the more detailed, the better! I start with a solid wood frame, as shown below, and I lightly sand it. If your frame has knobs like this one, be gentle sanding over them or it will sand off their "roundness." If you are using CECE CALDWELL's paint, you can skip the sanding step. Her paint will stick without the sanding (SCORE)!!!

Next, I applied one coat of CeCe Caldwell's Chalk Paint in Vintage White using my Purdy Little Chubby paint brush (perfect size for the sample container). I put on a good, thick coat, not worrying about direction, etc as this will add texture when I apply the second coat of color and wax. Just a reminder that chalk paint is much thicker than Latex paint, so it will cover a bit differently (better)
:

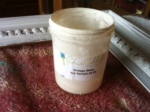
You'll notice my small little CeCe Caldwell's Chalk Paint paint sample container at the top of the picture. I am also posting a picture of the sample below. This is the BEST deal for small projects. This 4 oz. container is $6.95 and it is enough to paint an entire chair!! I used this on two frames and I still had 3/4 a jar left.

For the third and fourth steps, I painted the first and second coat of its main color, CeCe Caldwell's Santa Fe Turqoise. First coat, same thing as above, just slap it on. I let that coat dry completely. For chalk paint, the dry time for a project this small is less than an hour. Second coat, I was a bit more controlled with my brush so that my strokes were more even. I let this coat dry completely.
Next, I distressed the frame. Again, I did this with a light hand and just 120 grit sand paper held in my hand. I used more force, or what I call a heavy hand, around the edges and outside frame section because I wanted the raw wood to peek through.
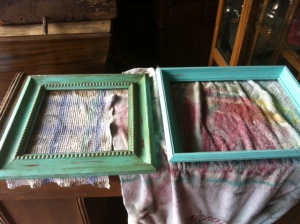
Final step is sealing the paint. Now here is where it gets fun! You can see in the images below what a difference in color the that wax creates. Both frames were painted with Santa Fe Turqoise, however, the frame on the left is the one shown in the above posts and is covered in CeCe Caldwell's clear wax, tinted in Hershey Brown. You can see the drastic change in the Santa Fe Turqoise color after applying the wax.

After the wax dries, your frame is ready to go! This project took a total of 2 hours, and probably could have even been done in less time, but I wanted to ensure each coat was completely dry before going on to the next step. My total cost was around $4.00 as I paid $1.00 for the frame, then used a fraction of the sample paint jar, sand paper, and wax. I had plenty of these supplies left to do a chair and another frame (I buy the wax in bulk, so I barely used any of it on this small project).
Here is the finished project and its matching table. When I do an open frame like this, I always have people ask "But what do I do with it?" and to this I say "The possibilities are endless!!" You can hang wire on the back (most of mine come with this anyway) and hang pictures or artwork inside it, you can use it as traditional frame, insert your picture, and just cover the back with card board or foam board, again, there are so many possibilities!


Now for metal or plastic, you can use any time of latex or chalk paint, or you can also use spray paint. Spray paint is just so unpredictable because it runs, it is temperamental dependent on weather conditions, and it is messy . However, sometimes brush strokes are harder to even out when painting metal or plastic, so spray paint feels like the easiest choice :) This is something to play with and find what works for you! That is the best part...there is no right or wrong! When panting metal or plastic, I lightly rough the item up with sand paper, really concentrating on cracks or details because the paint does not like to stick as much to these materials. I then follow the exact same steps as above, EXCEPT when distressing, I do so with care. These materials scrape up easily and are not as smooth to finish out. Start out gentle and you can always use more force as you go along. You can use wax to seal these materials as well, however, I normally use Laquer just to give it more shine. Again, it mainly depends on the desired look I am aiming for.
Hope you find this helpful and happy painting!!!

No comments:
Post a Comment