I LOVE color...I mean, the brighter the better! However, when it comes to painting furniture, I have played it pretty safe. Now, don't get me wrong, I use a lot of turquoise, etc. but it usually just in a one color piece or maybe a two color blended piece, but that is about as exciting as it gets here at Southern Charm Designs. Many of you probably don't know this, but I started out painting picture frames. I used to paint colorful, fun frames, with lots of fun designs. I then moved to playing around on furniture, but never dared to bring that "funness" into my furniture painting. I felt more comfortable keeping it "classic" or "timeless."
Maybe it is the 9 month pregnancy hormones, or maybe just a desire to try something "new" , but I needed to step our of my comfort zone and push myself to do something a little different; more fun. Enter in a cute little (although very orange) drop leaf table. It had such great lines that I fell in love with it right away. However, once I got into my garage, the orange just kept giving me the "blah" vibe...was not looking forward to tackling it. Finally, I pulled it out and it hit me...this is the piece I want to "go big" on...big as in color and design. And so the plotting began...
First, I primed this little beauty. I was not using chalk paint on this one as I wanted bolder colors, so I needed to sand and prime it. I did not do a lot of sanding as I wanted to it to stay "naturally distressed" as much as possible. I used Killz primer just because the orange was so bright and heavy. I am not normally a fan of Killz as it is a really heavy primer (and tends to bubble up), however I felt it was the best choice for this particular project. I did have to wear a heavy duty respirator mask since I am pregnant...probably quite a hilarious vision for my neighbors. After sanding and priming, I started adding the color. I used matte black paint for the top as I wanted it to be a totally blank canvas for me to add to. I then applied the high-gloss turquoise for the legs. TIP: when painting a piece with curvy/knobbed legs, I turn the piece upside down to paint the legs...to me it just gives you a 360 degree view and I can see any "blank" spots I may have missed (it is sometimes hard to get your brush into those curves, so this helps your view into all those curves). I have to say that I am so used to chalk paint that I had forgotten how "blah" the latex paint can be...but it worked out and I think the next time I am doing so much blank space in black, I'll buy semi-gloss or gloss.
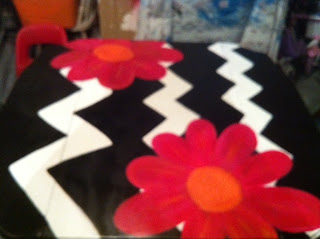
After letting the paint dry, I began my design on top. I went totally rogue on this one...I grabbed a can of white semi-gloss paint and my Purdy Little Chubby brush and free-handed the chevron across the top.You could always use a stencil if you aren't comfortable free-handing your design!! You could also use white acrylic paint if you had that in your DIY drawer. I chose white because I wanted it to be very bold, popping off that black and pop it did! I love it! My hand honestly shook through out this process as it had been a long time since I'd done a design on such a large space...funny how I still get nervous when I know it is just paint!!
Once the white paint had dried, I began the flowers. I drew them out with pencil first, then began painting them with a blend of red/pinks/ orange and yellow acrylic paint. This takes a lot of layers and quite a bit of time to cover up the black underneath, so I would say the flowers are the most time consuming part and where you have to have the most patience. I then sealed it with polyurethane because I wanted to make sure the design was heavily protected.
Overall, I am pretty happy with how it turned out...I'm not in love with it yet, but I am so glad I stepped out there and used the same creativity I started out with. It was fun to just play with color and honestly just go with wherever the design went. I also learned a lot about what may work on a small wood frame does not necessarily work on a larger piece, so I look forward to applying that knowledge to the next piece and getting an even more fabulous piece :) Oh, and I am going to put "editing" and "photo staging" on my list of things to tackle in the near future...this background is hideous!
Happy Creating and remember to HAVE FUN with what you do!


No comments:
Post a Comment